


 Submitted
How to Upgrade Quick Heal Antivirus to ‘Latest Version’
Un-installation Steps for old version
Step 1: Make a note of Quick Heal Product key
- Open Quick Heal Antivirus;
- Click on Help from the top-right corner of the dashboard;
- Click the “About” section;
- Click on License details to get the product key.
*Product key will be needed while reactivation. Kindly make a note of your product key.
Step 2: Click Uninstall Quick Heal from Start-Programs-Quick Heal group.

Step 3: Click on Yes to remove Quick Heal completely

Step 4: Click on Next to remove Quick Heal completely

Step 5: Wait till process is completed

Step 6: Uninstallation will be completed

Step 7: Kindly restart the system post completion of Uninstallation
Download, Installation & Activation of Quick heal Latest Version:
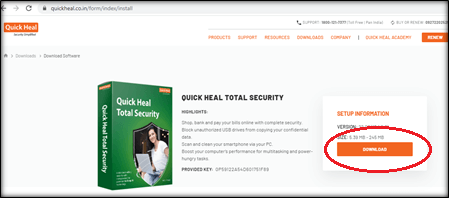
Step 1: Download the latest software of Quick Heal from the link: www.quickheal.co.in/installer
Step 2: Provide your valid Product key and click on 'Submit' option.

Step 3: Click on Download
Step 4: QHTS file will download in the download folder by default

Step 5: Double click on QHTS file, you will get below window

Step 6: Select checkbox to accepts the terms & condition and click on Let’s Start

Step 7: Quick Heal Setup downloading & installation process will be start

Step 8: Select location if you wish to install Quick Heal Software in any other location or keep the default location & Click on Continue

Step 9: Installation will take place as below:

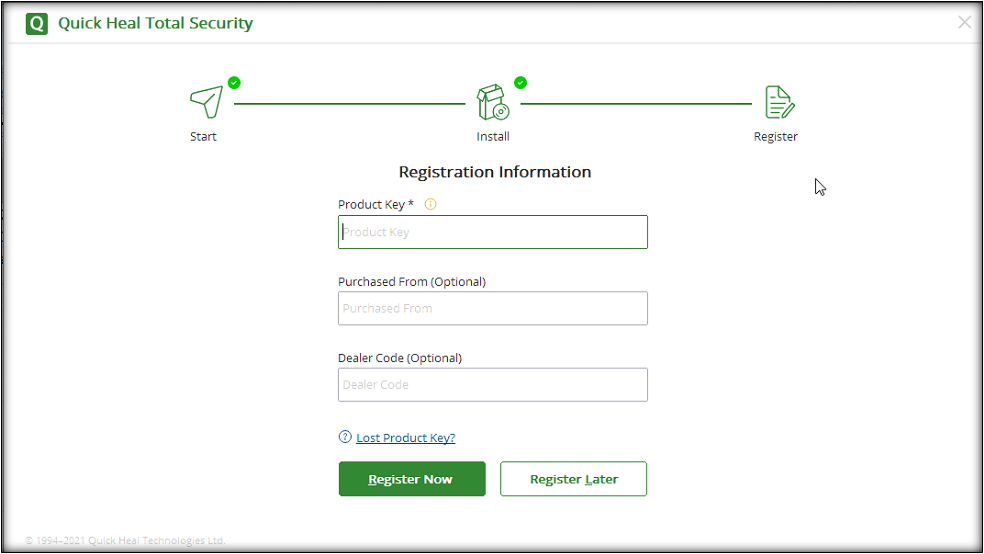
Step 10: Enter registration details for activation
Step 11: Reactivation process

Step 12: Activation successfully completed:

Completion Status
